5 DIY Birdhouse Designs and Ideas
- Jun 25, 2020

Now that it’s officially summer and your flowers are beginning to bloom, it’s time to spruce up your garden décor. What better way to add to your garden than by adding a DIY birdhouse? With these 5 designs and ideas, you can get your whole family involved in making your very own DIY birdhouses! From basic wooden birdhouses to modern birdhouses, and even tips on how to DIY your own bird feeder, these houses and accessories can be easily recreated by beginners, kids, and adults.
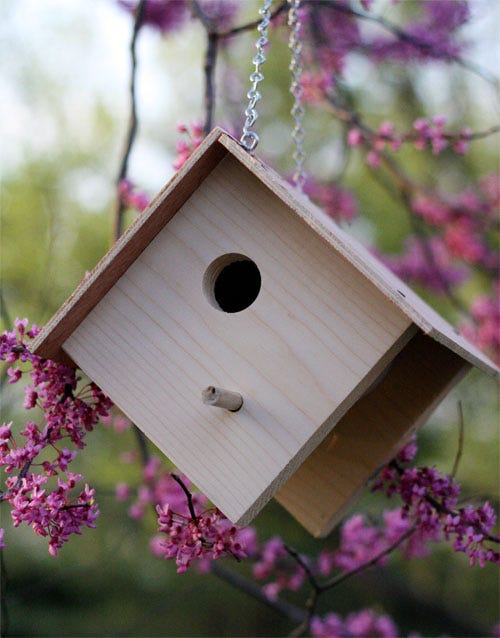
1. Basic Wooden Birdhouse:
If this is your first time making a birdhouse, this basic design is perfect for beginner woodworkers. Once you get the materials, this simple design will have you getting your kids engaged with ease. All it takes is the right materials, a few good measurements and good spirit from your family! For step-by-step directions on how to assemble this basic wooden birdhouse visit Skip to My Lou and have this fun addition to your garden completed in no time!
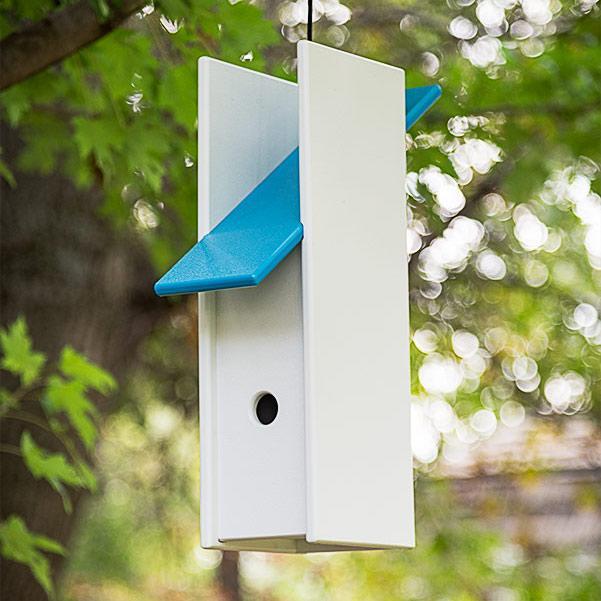
2. Modern Birdhouse:
Whether you’ve been woodworking for a while or just want to dive into something a little more challenging, these modern birdhouse designs will have the whole family working together to add a wooden piece to the garden. Using only a few tools including a table saw, router table, and joints like rabbits and dadoes, you can create a mid-century birdhouse that will become the perfect living space for birds for years to come. For step-by-step instruction, follow Curbly and have fun creating your modern bird house today!
3. Repurpopsed Birdhouse:
If you’re looking for a quick and quirky DIY birdhouse, look for unused items around your house that can be repurposed into birdhouses that will add some spunk to your garden! It’s as simple as finding an old wooden drawer and a teapot you no longer use. All you need now is twine. By poking two holes into the top of the drawer, you can then hang the teapot from the twine by threading it through the holes. For more stability, glue the teapot to the back off the drawer so that the birds can build their nests in the empty pot. You can even glue the top of the teapot to the bottom of the drawer so it will act as a landing perch for your new bird family!
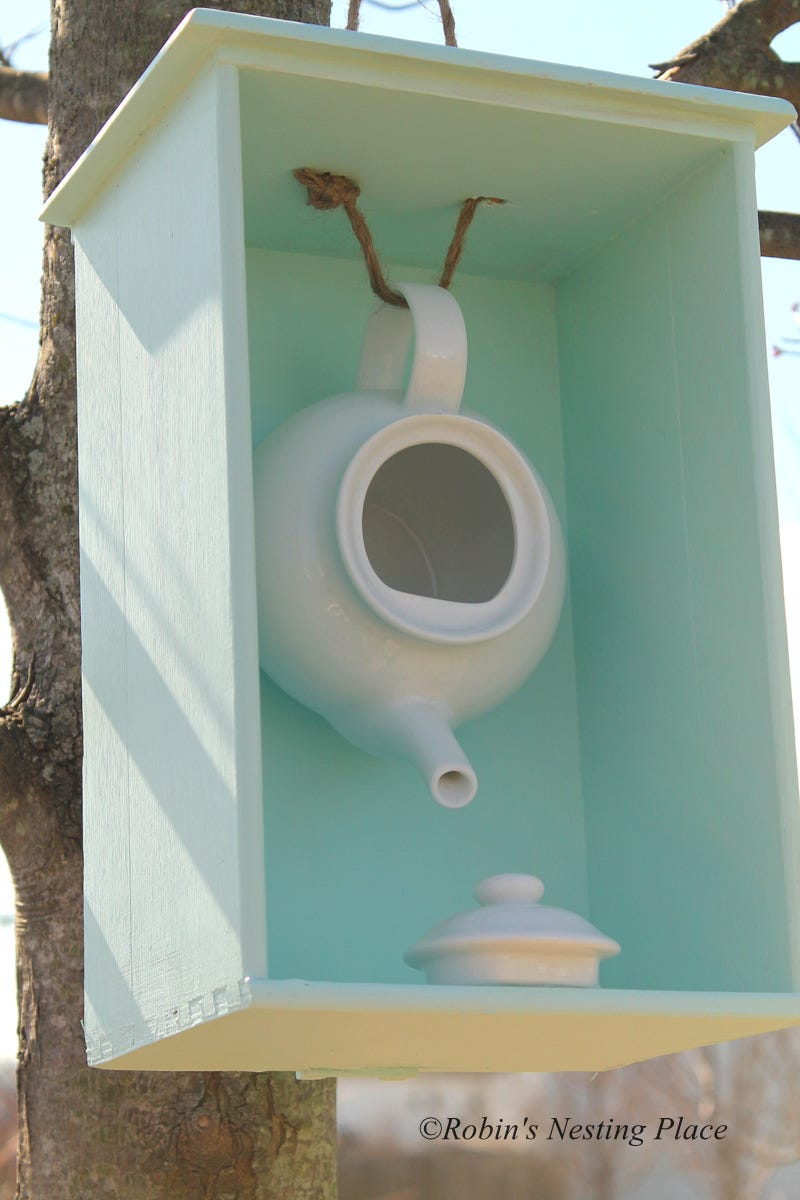
Project adapted from Robins Nestin Place.
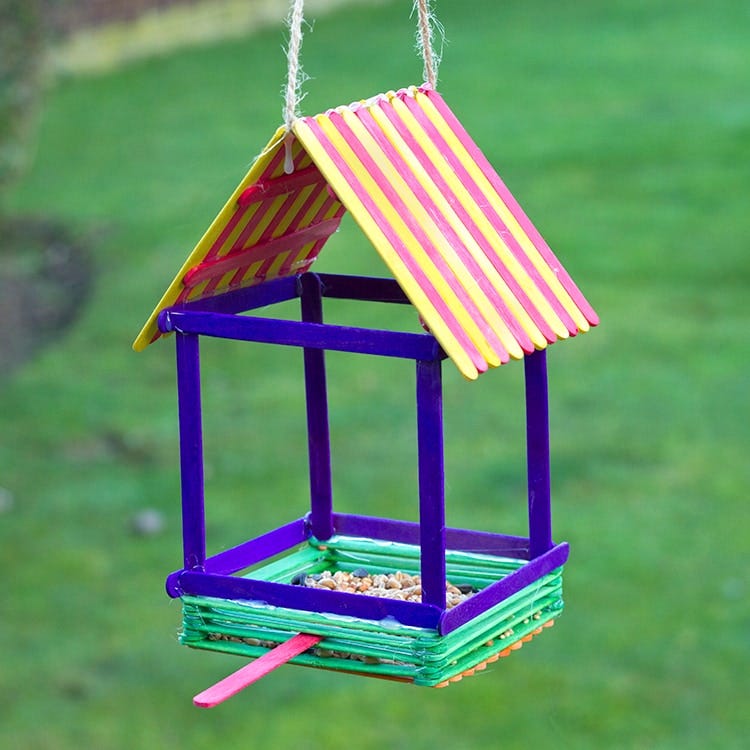
4. Popsicle Stick Birdhouse:
Does your family like the refreshing taste of frozen popsicles in the summer? Next time you’re enjoying this frozen treat, think about saving those popsicle sticks instead of throwing them away! This beginner birdhouse is so easy and fun to create, and it will only take your kids 30 minutes to replicate with adult supervision! All you need is popsicle sticks, twine, a glue gun, and scissors. We suggest the kid-friendly Stanley Minnow 5” scissors for this craft! For step-by-step instructions, follow Baker Ross and their guide on how to assemble this popsicle stick birdhouse. Once it’s complete, all you’ll need is some bird seed for the bottom!
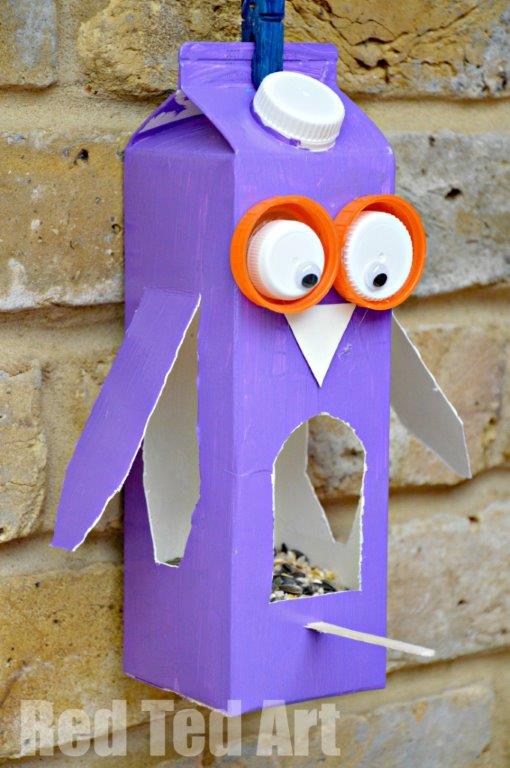
5. DIY Bird feeder:
It’s time to add the final touch to your new birdhouses! To keep those birds coming back year after year, think about placing your own DIY bird feeder next to the houses. Put your recyclables to good use with this quick and easy DIY bird feeder. Follow the steps below for this fun and crafty kid-friendly garden feeder design!
Materials:
- Empty juice or milk carton
- Paint colors of your choice
- Stanley Minnow 5” scissors
- Plastic bottle lids
- Googly eyes
- Craft sticks
- Hot glue gun
Step 1:
Start by painting the carton the color of your choice! This paint must be coated over twice if you want the colors to show smoothly and appear evenly. If you plan on keeping the feeder outside all summer, we suggest using enamel paints as it is waterproof and weather resistant.
Step 2:
Once the paint has dried, use the Stanley Minnow 5” scissors to cut out the “tummy” and “wing” shapes to create the owl shape. With the extra cardboard from the stomach, cut a small triangle to use as a beak on the owl. Don’t forget to add the googly eyes to the bottle caps above the beak! Once you’ve finished cutting, all you have to do is add the bird feed to the base of the carton and watch as the birds come feast all summer!
We hope you found this helpful in creating your own DIY birdhouses for your gardens this summer! Tag us on Twitter (@Bostitchoffice) with your completed birdhouse looks!
Project adapted from Red Ted Art.
Pin it!


