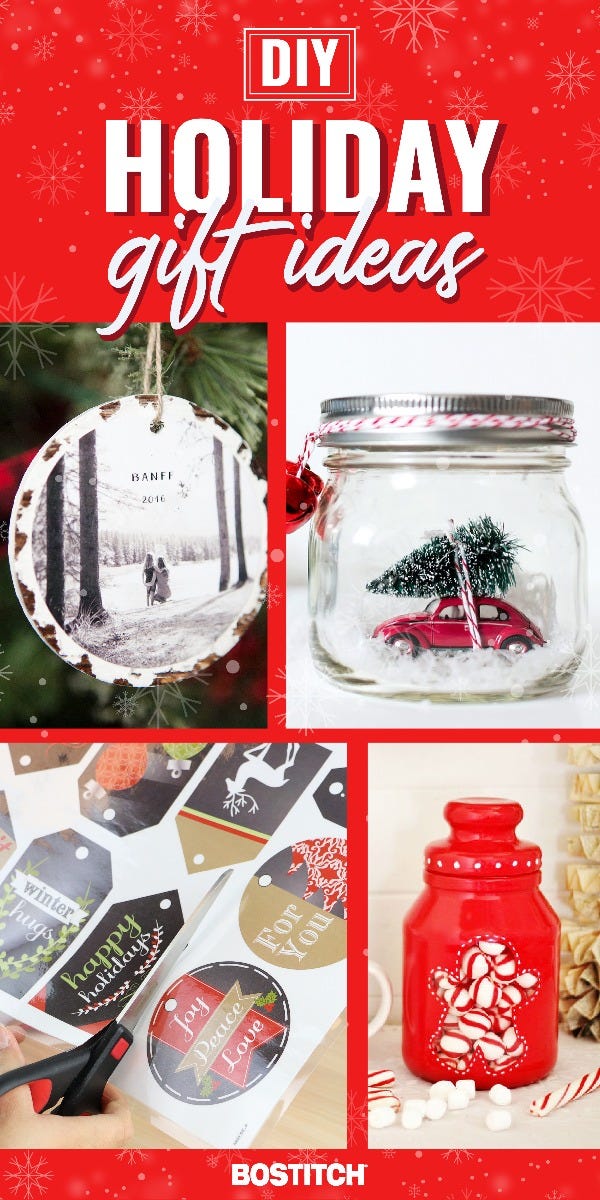
Last Minute DIY Holiday Gift Ideas
- Dec 13, 2019

The Holidays are coming fast, and with it comes season of giving. Are you worried about what you’re going to get for your friends and family? There are so many people in your life that you want to show your appreciation to but you’re just not sure how. We have the perfect last minute DIY holiday gift ideas for you to personalize gifts your loved ones won’t forget!
DIY Holiday Snow Globes
Do you have any extra mason jars just sitting around the house? Don’t let them go to waste! This DIY Holiday Snow Globe guide is a perfect way to use those jars and give an inexpensive, sentimental holiday gift to your loved ones this season!
Materials:
- Mason jars
- Mini Christmas tree
- Mini Car
- Glue
- Scissors
- Faux sparkling snow
- Jingle bells
- Red and white ribbon/yarn
Steps:
- Start by cutting the stem off of the mini tree with Stanley 8” Non-Stick Titanium Scissors, and gluing the tree on top of the toy car.
- Use the red and white ribbon to tie the tree to the top of the car so it looks like it is being hauled on top of the car.
- Glue the toy car to the bottom of the mason jar and place the faux snow around the car.
- Once you have added the snow, place the lid on the mason jar and tie the ribbon around the top with bells attached to the ribbon.
- You can replicate this snow globe by also using miniature snowmen, a Menorah, or little plastic presents to glue in the middle as a center piece for your own unique touch!

Project adapted from Simple As That
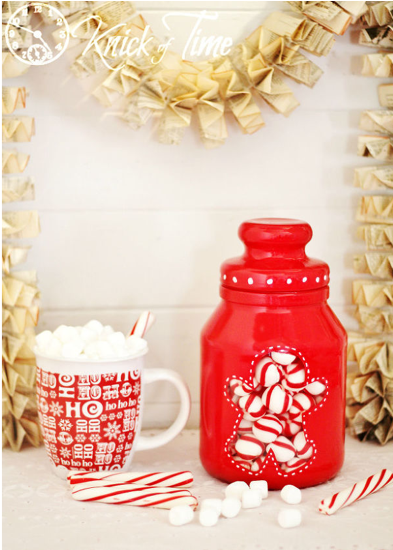
DIY Gingerbread Cookie Jar
Do your family and friends love to snack on a sweet treat but never have anywhere to store them? This Gingerbread Cookie Jar is the perfect DIY gift to give away for the holidays as it will add the perfect festive touch to any kitchen!
Materials:
- Empty candle jar or large mason jar
- Gingerbread cookie cutter stencil
- Paper
- Spray paint
- Acrylic paint pen
Steps:
- Use the gingerbread cookie cutter stencil to trace an outline on a piece of paper and tape the outline to the middle of the jar.
- Once the paper is taped to the jar, use red or green spray paint to cover the glass jar making it colorful and festive!
- Remove the paper from the glass jar to see a clear “cut out” in the shape of a gingerbread man!
- Use the acrylic paint pen to make a dotted outline of the gingerbread man and add a decorative touch of your choice to personalize the jar!
- Before gifting the jar, fill it with candy or home-baked cookies to fill in the gingerbread man!
Project adapted from Home Talk
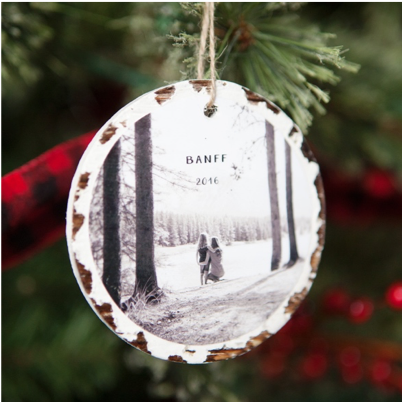
DIY Ornaments
What’s better than a personalized gift for your loved ones to enjoy? A personalized gift that they can hang on their trees for years to come! Every time they open their box of decorations and get ready to set up the tree, this will help them think of you! Follow our guide on how to make your own DIY photo
Materials:
- Twine
- Round wood ornaments
- Foam brushes
- Wood glue
- Scissors
- Printed photo
- Hole punch
Steps:
- First start by choosing the photos you want to use as the center of the ornament! To print as a standard size, simply copy and paste your circular photo onto a blank 4×6 canvas.
- Next, use the wood glue to paste to the back of your picture and attach to the circular wood canvas. (Tip: you can paint around the edges of the photo onto the wood white to add a more distressed look).
- Once the picture has been attached (and the paint has dried), use the EZ Squeeze One Hole Puncho poke a hole through the top of the disc.
- Using Stanley Titanium Scissors, cut a piece of twine to your standard and simply string the twine through the hole and tie at the top to make a loop the ornament can hang from.
Project adapted from Simple As That
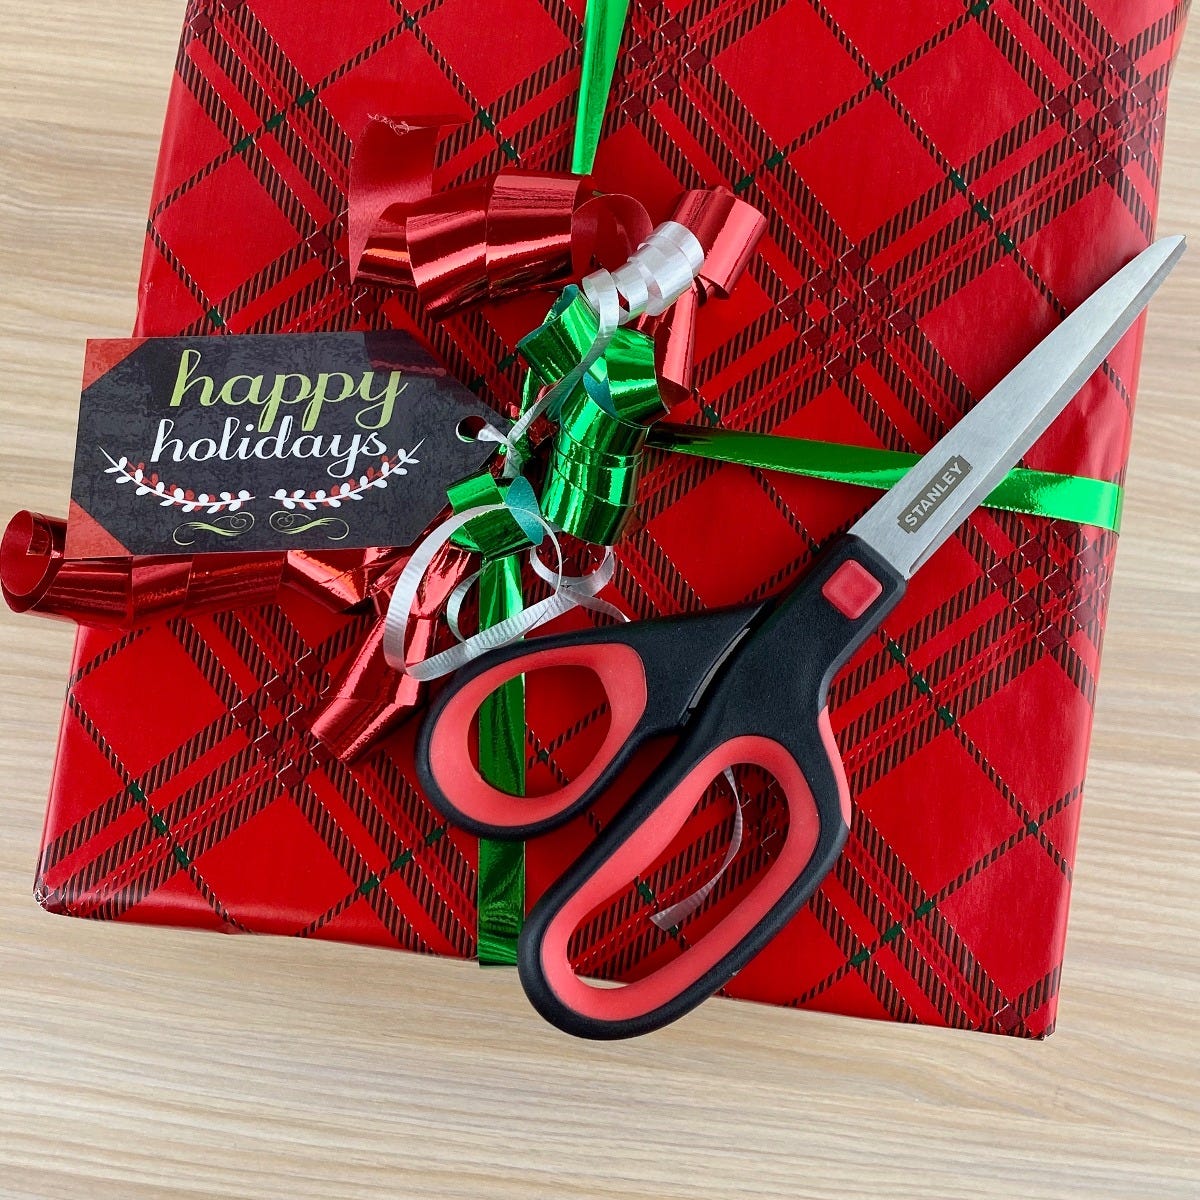
DIY Gift Tag
Now that you’ve made your gifts and wrapped them too, follow our step-by-step guide on how to make your own gift tags! You can even download our free printable gift tags and laminate them to make them sturdier and last longer!

Materials:
- Cardstock paper
- Scissors
- Stencils
- Marker
- Thread
- Hole punch
- Laminator
Steps:
- Step 1: Start by using a rectangular stencil to draw to your desired size. To create the rectangle gift tag, cut 2" x 3½" and use the Multi-Purpose Scissors to cut it out. To make the traditional tag shape, snip off two of the corners, or use these free printable tags that we've designed for you. You can download those by clicking the "Download Now" button above!
- Step 2: Once you’ve cut your gift tag, it’s time to design it! Use markers, pencils, glitter – anything you’d like – to decorate your tags to your holiday preference!
- Step 3: Now, it’s time to laminate! Make sure your tags can stand the test of time by preserving them with a laminator.
- Step 4: Use the EZ Squeeze one hole punch to poke a small hole in the top of the gift tag.
- Step 5: Use the ribbon or threat to tie to the end of the tag to easily attach to your gifts!
Let us know if these holiday gift ideas and tags helped make the season a little easier and more special for you by tagging us on twitter (@Bostitchoffice)!
Pin it!